This guide walks you through setting up Google Cloud DNS to serve requests for a domain name purchased via GoDaddy.
Why use Google Cloud DNS?
Using this service takes advantage of Google’s domain name system (DNS) infrastructure. Google Cloud DNS is production-quality, can handle high-volume DNS requests, has low-latency, and is secure. It especially makes sense to adopt Google Cloud DNS if your site is built on the Google Cloud Platform.
Assumptions
Before we being, we will assume that:
- You have a VM instance in the Google Compute Engine environment
- You have a domain registered with GoDaddy
Create a static IP address for your VM instance
Follow these instructions to reserve a static IP address for your VM instance.
Note down the IP address that was reserved for you.
Google Cloud DNS – create a new DNS Zone
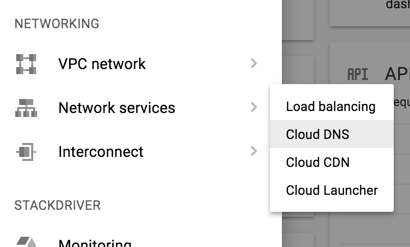
From the left-hand menu navigate to NETWORKING > Network services > Cloud DNS
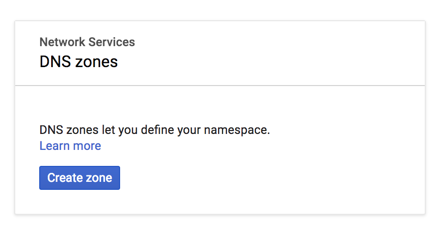
Click on Create zone
Configure your DNS zone. We will assume we are setting a DNS zone for xyz.com
- Zone name: needs to be a unique name and the format is up to you. I prefer using the format
dns-zone-{{domain}}(e.g.dns-zone-xyz-com) - DNS name: The domain you are setting the DNS zone for (e.g.
xyz.com) - DNSSEC: Off
- Click on the Create button
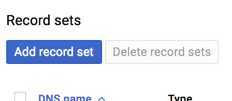
You will now be taken to the page listing out all the records for this zone. By default it will have a NS and a SOA zone.
Now let’s create an A record for our domain pointing to the static IP address we created in the previous step.
Click on Add record set
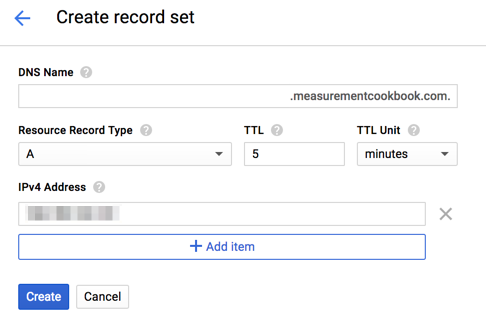
Enter your settings:
- DNS Name: of the form
.yourdomain.com.(note the leading and trailing dots) - Resource Record Type: A
- TTL: 5
- TTL Unit: minutes
- IPv4 Address: the IP address you noted down from creating a static IP address
- Click on the Create button
Repeat the above steps for any other records you wish to configure – e.g. MX records for mailservers or CNAME records for subdomains.
Now take note of the provided NS values for the next step. The values will look like:
ns-cloud-c1.googledomains.com.
ns-cloud-c2.googledomains.com.
ns-cloud-c3.googledomains.com.
ns-cloud-c4.googledomains.com.
GoDaddy – point your domain’s nameserver to Google Cloud DNS
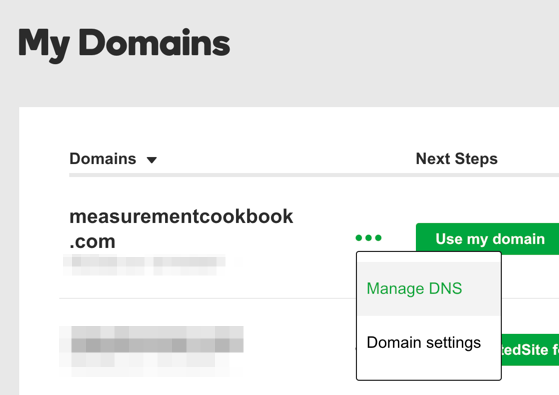
Log in to GoDaddy and go to your My Domains page.
Click on the three dots next to your domain and select Manage DNS
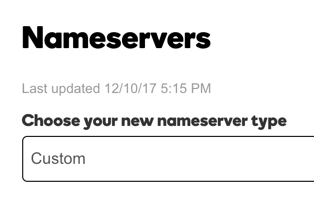
Scroll down to Nameservers
Click on the Change button
Choose your new nameserver type: Custom
Add the nameserver names that were listed in your NS record. Keep in mind:
- Remove the
.at the end of each nameserver address. GoDaddy does not like it. - There are fields for the first two entries. For additional entries, click on the Add Nameserver button.
Click on Save when done.
Testing
Let’s test whether everything worked. So far we have:
- Created a static IP address in the Google Cloud Platform
- Created a DNS Zone in the Google Cloud Platform
- Created an
Arecord pointing to the static IP address we created - Configured our domain’s DNS settings in GoDaddy to point to Google’s nameservers
Open up a terminal on your machine.
Type in nslookup yourdomain.com. If everything is OK, you’ll see something like the below. Ensure that the Non-authoritative answer > Address value corresponds with the static IP that you created.
$ nslookup measurementcookbook.com
Server: 8.8.8.8
Address: 8.8.8.8#53

Non-authoritative answer:
Name: measurementcookbook.com
Address: 104.199.123.101
If you don’t see this in your terminal, wait 2 minutes and try again. It can take some time for the changes on GoDaddy to propagate through to Google.
If you’re still not seeing the right results, retrace your steps above and ensuring that:
- You are using the correct static IP address in your
Arecord - You entered the correct nameserver addresses into GoDaddy’s nameserver settings for your domain
Muy buen artículo. Muy útil
I followed your steps properly, but still didn’t get the desired result. Can we talk over email where you could double check my records?
Thanks
woow thnx man, it worked for me thanx alot
Very helpful, thanks a lot!
I followed the steps provided in your article but it dint worked for me.
while i type the command nslookup vaasit.in
it show cant find vaasit.in no answere
however NS i have configured in godaddy. Record A has been created in google cloud platform.
may you help what may gone wrong .
Hi Vipin, is this still an issue for you? When I perform an `nslookup` on your domain I see that it has been given an IP address that is housed by Google.
Funciono muy bien para el dominio, pero tambien tengo una cuenta de email en godaddy y no desde que cambie las dns dejo de recibir emails, solo los envia, como configurar las dns y esos registros mx para que funcione el mail correctamente
good one… I have followed this and i can see my domain name in nslook. but my GoDaddy account showing “We can’t display your DNS information because your nameservers aren’t managed by us.” and also i can’t access my domain from browser
Hi Seenu,
GoDaddy gives you that message because it is no longer managing the nameserver for your domain. That is done by Google Cloud DNS instead.
Do you have a web server set up at the IP address that your domain resolves to? And is your server set up to allow incoming HTTP traffic?
This really helped. At first search could find out this guide and saved lot of time. Thank you VINOAJ for putting this together.
Only thing is https become not secure, may be required to buy SSL certificate at godaddy.
Don’t you need to set an A record in goDaddy pointing to the static IP created in GCP?
Hi Sedky. No you don’t. You only need to tell GoDaddy that the DNS records for the domain is managed by Google. Then within Google you can set your A records.
hey thanks for the wonderful blog,I am facing an issue btw, my domain doesn’t work with a prefix of ‘www’ can you help me figure out a solution for this?
Sure. Can you please provide details of the issue you’re facing?
The issue is as said ,the domain doesn’t work with prefix of www, neither does yours(www.vinoaj.com)